Top 10 Wi-Fi Hacking Tips Link to heading
In this post, I want to share some of my top Wi-Fi hacking tips that I always give to anyone who is learning about Wi-Fi. So, it’s going to be short, but I hope it’s helpful.
Table Of Contents
1. Advanced airodump-ng (sorting, selecting, and coloring) Link to heading
In airodump-ng, you can sort Access Points (APs) and clients, select a specific AP, and even apply colors to each AP and its associated clients. This makes it easier to differentiate between different APs and clients.
The process itself is quite simple. The first step I always recommend is sorting the APs and clients by the number of Data packets. This sorts everything based on the amount of real traffic each emit, so the first APs and clients that appear are the ones with the most traffic (which are usually the ones we’re interested in). To do so we only have to press s until the text shows sorting by number of data packets:

To enter selection mode, simply press TAB. Once in selection mode, you can navigate through the APs using the arrow keys and see their clients highlighted at the same time.
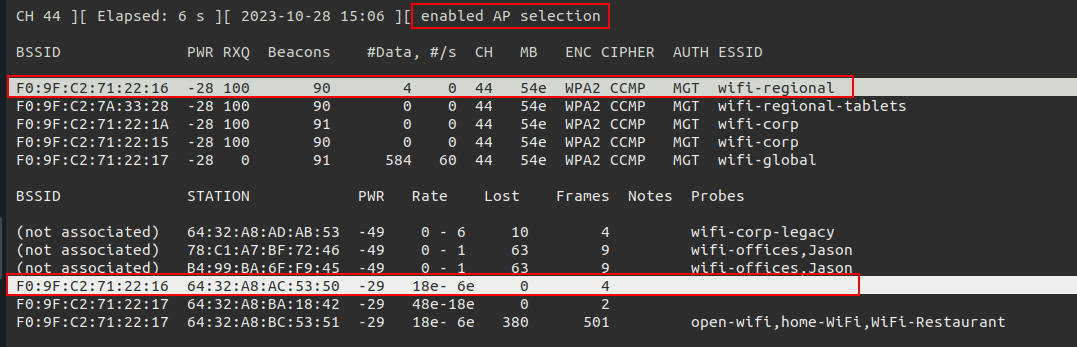
When you have an AP selected, you can use the m key to cycle through the different colors supported by airodump-ng. This allows us to have captures like the following:
Additionally you can use the space to pause the output on screen (when the ouptut is stopped the other shortcuts do not work).
2. Monitoring 2.4 GHz and 5 GHz (and in the near future, 6 GHz too) Link to heading
By default, airodump-ng only monitors 2.4 GHz. However, if you want to search for APs on all channels, you need to add the --band abg flag to make it search in all supported bands.
airodump-ng wlan0mon --band abg
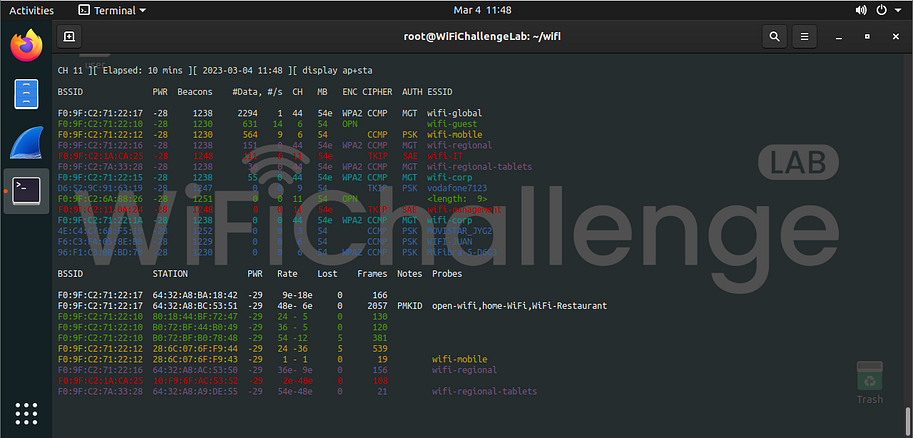
In the following image you can see how there are 2.4 and 5ghz APs:
If you only want to monitor the 5 GHz band, you can use the --band a flag.
3. Monitoring 2 or more channels Link to heading
In airodump-ng, we can monitor only one channel using -c followed by the channel number. Furthermore, it is also possible to monitor multiple channels by specifying them separated by commas. For example, if we want to monitor channels 6 and 44, we can use -c 6,44.
airodump-ng wlan0mon -c 6,44
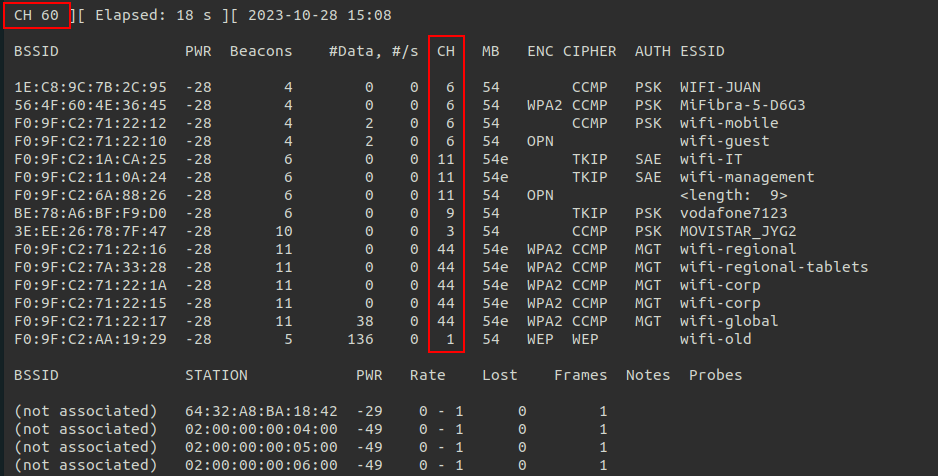
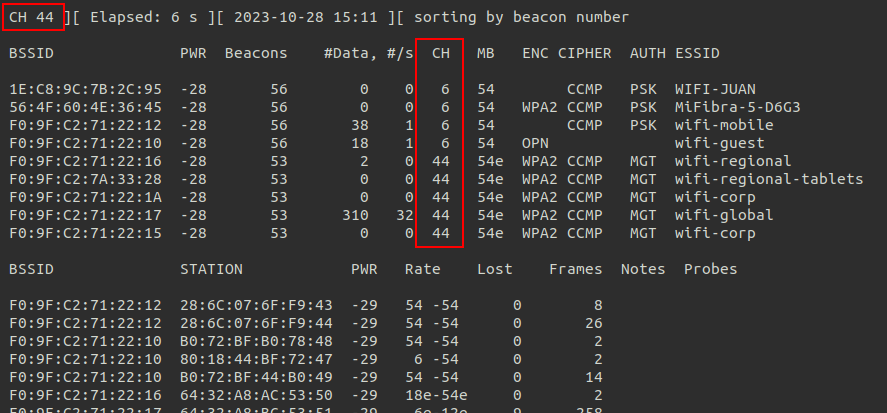
In the following images you can see how there are APs on channel 6 and 44 and the channel only jumps between those 2:

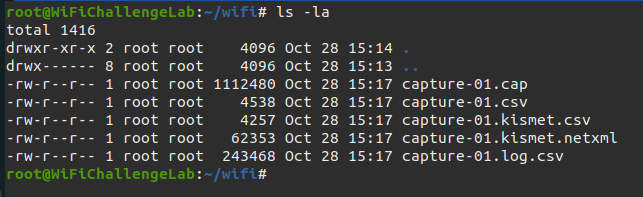
4. Saving all output of airodump Link to heading
As a general recommendation, I always suggest saving all the output of airodump-ng to disk. This way, we can have evidence or refer back to the captured information later. I usually use -w filename to save in all formats (.cap, .kismet.csv, .kismet.netxml, .log.csv, and .csv). Alternatively, you can use -w filename --output-format cap to save only the .cap file.
airodump-ng wlan0mon --band bag -w ~/wifi/capture
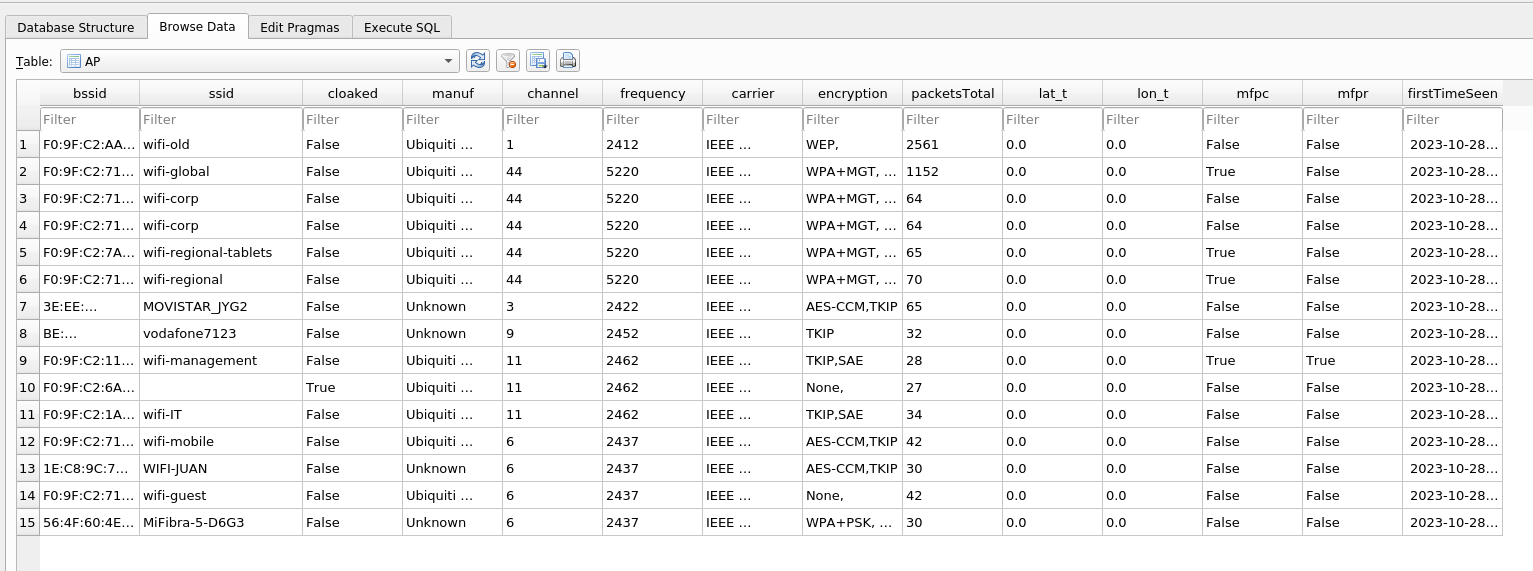
5. Using wifi_db Link to heading
With the files generated by airodump-ng, we can obtain a lot of useful information using wifi_db . wifi_db allows us to analyze relationships between clients and different APs, as well as handshakes, users of MGT networks, probes from clients connected to networks within the scope, etc. In the following links you can see in more detail how wifi_db works and how it can be used to obtain information.

You can learn more about wifi_db in the following posts:
- wifi_db: a tool for collecting and analyzing data from wireless networks
- Using wifi_db in WiFiChallenge Lab v2.0
6. Use monitor interfaces only if needed Link to heading
One common mistake that many people make, mostly because it doesn’t usually cause any issues, is using monitor mode interfaces for unnecessary purposes. This may not cause many problems because the tools usually automatically configure the interfaces. However, it’s always recommended to do things properly and have control over interface changes.
When it comes to monitoring traffic from other clients or gathering information about other clients, using monitor mode is necessary. However, when it comes to connecting directly to an AP, creating a fake AP, or scanning only APs, monitor mode is not necessary. It’s important to differentiate between these cases.
- Monitor mode
- Monitor Wi-Fi traffic (airodump-ng, mdk4)
- Deauth attacks (aireplay-ng)
- Managed mode
- Connect to an AP (wpa_supplicant, wpa_sycophant, air-hammer, EAP_buster, wacker)
- Create a AP (eaphammer, berate_ap)
- Scan for APs (nmcli)
7. Connect to AP using CLI instead of Network Manager Link to heading
When connecting to different APs from Linux (assuming that all these attacks are performed on a Linux system), I don’t recommend using Network Manager in most cases. Yes, it’s much easier and straightforward to connect directly using the GUI, and nothing out of the ordinary is required. However, when connecting to a network that we don’t control, it’s advisable to use the terminal to have full control over what we’re doing and be able to see any errors that occur.
For example, if we connect to an AP that has MAC filtering, using the GUI will simply result in a failed connection attempt without any further information. On the other hand, by using the terminal, we can see detailed information about which part of the connection process has failed. The same applies if the network doesn’t have DHCP, as the NetworkManager will fail by default when it can’t obtain an IP.
That’s why I always recommend using wpa_supplicant to access networks, with the understanding that after connecting, we need to manually configure the IP or use dhclient to obtain an IP through DHCP.
Below, I’ll provide some examples of connecting to different types of networks from the terminal using wpa_supplicant.
OPN Link to heading
network={
	ssid="open-network"
	key_mgmt=NONE
	scan_ssid=1
}
WEP Link to heading
wep-conf
network={
  ssid="wep-network"
  key_mgmt=NONE
  wep_key0=123456789a
  wep_tx_keyidx=0
}
PSK (WPA2) Link to heading
network={
    ssid="psk-network"
    psk="password"
    scan_ssid=1
    key_mgmt=WPA-PSK
    proto=WPA2
}
SAE (WPA3) Link to heading
network={
    ssid="sae-network"
    sae_password="password"
    key_mgmt=SAE
    scan_ssid=1
    ieee80211w=2
}
MGT (WPA2/WPA3) Link to heading
In MGT there are multiple options, the most common being MSCHAPv2 and TLS:
MSCHAPv2 Link to heading
network={
    ssid="mgt-mschap-network"
    scan_ssid=1
    key_mgmt=WPA-EAP
    eap=PEAP
    #anonymous_identity="DOMAIN\anonymous"
    identity="DOMAIN\username"
    password="password"
    phase1="peapver=1"
    #ca_cert="/root/certs/ca.crt"
    #ieee80211w=0
    phase2="auth=MSCHAPV2"
}
TLS Link to heading
network={
    ssid="mgt-tls-network"
    scan_ssid=1
    mode=0
    proto=RSN
    key_mgmt=WPA-EAP
    auth_alg=OPEN
    eap=TLS
    #anonymous_identity="DOMAIN\anonymous"
    identity="DOMAIN\username"
    ca_cert="./ca.crt"
    client_cert="./client.crt"
    private_key="./client.key"
    private_key_passwd="whatever"
    #ieee80211w=0
}
8. Close the Network Manager if problems arise Link to heading
In ideal lab environments like WiFiChallenge Lab , NetworkManager usually doesn’t cause any issues. However, with multiple antennas, when we put them in monitor mode, NetworkManager may still interact with the antenna. Sometimes, it performs scans for APs and changes the channel on which it operates. That’s why another recommendation is to stop NetworkManager in these situations.
sudo systemctl stop NetworkManager
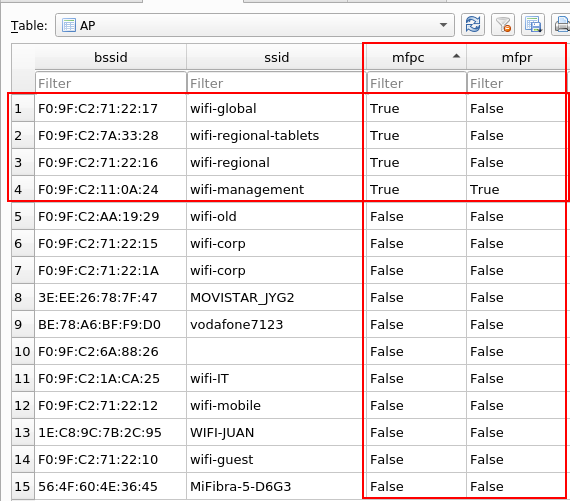
9. Check if MFP (802.11w) deauthentication is possible Link to heading
When performing normal attacks, if we want to act quickly, the recommended approach is to use a deauthentication attack. However, this may not always be possible. Some APs and clients use MFP or Management Frame Protection (802.11w-2009). This configuration is sent by APs in their beacons and it can be disabled, optional, or mandatory. In the case of being optional, it depends on whether the client can implement this security measure or not.
We can check for this using Wireshark, as shown below:

Or we can use wifi_db to determine if MFP is capable (MFPC) and required (MFPR):
10. Always keep in mind the basic attack paths for each network Link to heading
When it comes to classic attack paths for different types of Wi-Fi networks, there are a few common strategies that can be employed. Here are some examples:
OPN (captive portal) Link to heading
- Monitor client traffic
- Clone another client’s MAC and/or IP address
- Look for vulnerabilities in the captive portal
- Create a fake AP with a captive portal to trick users into revealing sensitive information
WEP Link to heading
- Attack the WEP AP, easier if there is a client.
PSK (WPA2) Link to heading
- Obtain the Wi-Fi password
- Bruteforce the WPS pin
- If there is a connected client, deauthenticate it to capture the Handshake
- If there are no connected clients, capture the PMKID
- If there is a probe request with no associated AP, create a fake AP to capture the handshake
- Set up a fake AP with an open network and a captive portal to trick users into entering the password
- With the Wi-Fi password:
- Monitor client traffic and decrypt it
- Create a fake AP with the same password to manipulate traffic or trick users into revealing their credentials or other sensitive information
SAE (WPA3) Link to heading
- Downgrade to PSK if its possible
- Bruteforce passwords
MGT (WPA2/WPA3) Link to heading
- If clients do not check the certificate:
- Set up a fake AP with MSCHAPv2 authentication and crack the password
- Set up a fake AP with a downgrade to GTC to capture credentials
- Relay the MSCHAPv2 credentials to gain network access without cracking them
- If clients do check the certificate:
- Perform ESSID stripping attacks
- Conduct phishing attacks targeting the probing behavior of clients
If you want more information about attacks you can take a look at the following mind maps.
- https://github.com/koutto/pi-pwnbox-rogueap/blob/main/mindmap/WiFi-Hacking-MindMap-v1.png
- https://github.com/eMVee-NL/MindMap/blob/main/WiFi/WiFi%20Mindmap.png